

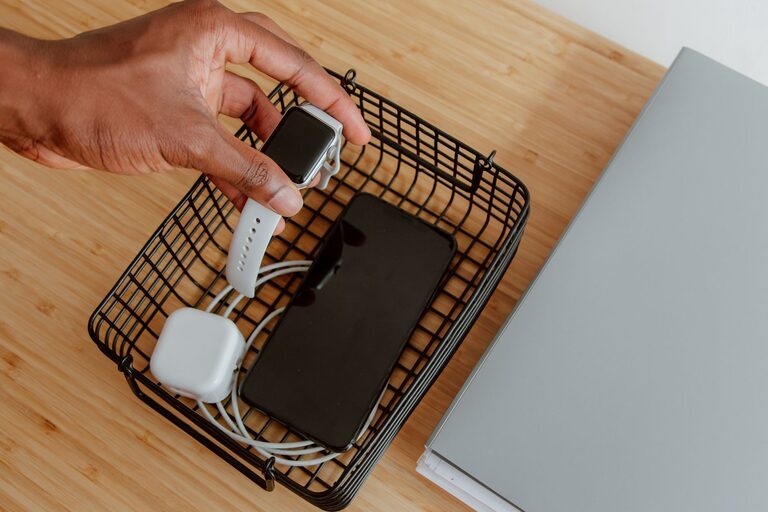
Setting up a charging station for your devices is a smart way to keep your gadgets powered up and your space organized. Whether you have smartphones, tablets, laptops, or other rechargeable devices, having a dedicated spot to charge everything can save time and reduce clutter. In this guide, we’ll walk you through everything you need to know to create an efficient, neat charging station at home.
Why Have a Charging Station?
Before we dive into the setup, let’s consider why a charging station is beneficial:
– Organization: Keeps cables, chargers, and devices in one place.
– Safety: Reduces tripping hazards from scattered cords.
– Efficiency: Simplifies charging multiple devices at once.
– Convenience: Ensures devices are always charged and ready to go.
Now, let’s explore how to set up your own charging station.
Step 1: Choose the Right Location
Selecting the right spot is the first step for a successful charging station.
– Central and Accessible: Pick a location you frequent often – like a desk, kitchen counter, or living room shelf.
– Near Power Outlets: Ensure there are enough power sockets nearby or consider using a surge protector with multiple outlets.
– Flat Surface: A stable surface helps prevent devices from falling or sliding.
– Away from Heat or Moisture: Avoid places like bathrooms or near radiators to protect your electronics.
Step 2: Gather Your Supplies
Here’s what you’ll need to set up your charging station:
– Multi-port USB charger or charging dock: To charge multiple devices simultaneously.
– Power strip or surge protector: Provides extra outlets and surge protection.
– Charging cables: Ensure you have the right cables for each device.
– Cable organizers: Clips, ties, or sleeves to keep cables tidy.
– Container or stand: To hold devices while charging.
– Labeling stickers (optional): Helps identify cables or devices, especially in shared spaces.
Step 3: Select a Charging Hub or Multi-Port Charger
Using a charging hub is more efficient than plugging each device into separate outlets. Here are some options:
– USB Wall Charger with Multiple Ports: Simplifies plugging in devices without clutter.
– Wireless Charging Pads: Ideal for devices that support wireless charging.
– Charging Dock or Station: Designed specifically to hold and charge multiple devices neatly.
– Power Banks (Optional): Useful for charging on the go, but usually kept outside the main station.
When choosing a charger, make sure it supports the charging standards your devices require (such as Quick Charge or USB-C Power Delivery).
Step 4: Arrange and Label Your Cables
Cable clutter is a common problem with multiple devices. Here’s how to manage it:
– Shorten Cables: Use cable ties or velcro straps to bundle excess length.
– Use Cable Clips: Attach clips to the side or back of your station to route cables neatly.
– Label Each Cable: This makes it easier to identify which cable belongs to which device.
– Color-Code if Possible: Using different colors can improve organization.
Step 5: Organize Devices for Easy Access
Once your cables and chargers are sorted, arrange your devices:
– Use a Stand or Tray: Keeps devices upright and easy to grab.
– Prioritize Device Placement: Devices used daily should be easiest to access.
– Avoid Overlapping: Allow enough space so devices don’t block each other’s ventilation.
– Consider Vertical Storage: Shelves with compartments can maximize space.
Step 6: Safety Tips for Your Charging Station
Safety is key when dealing with electricity and electronics.
– Use Surge Protectors: Protect devices from power surges or outages.
– Avoid Overloading Outlets: Check the maximum wattage your power strip supports.
– Keep Away from Water: Ensure the station is in a dry area.
– Ventilation: Don’t cover chargers or devices to prevent overheating.
– Regularly Inspect Cables: Replace any frayed or damaged cables immediately.
Step 7: Maintenance and Updates
Keep your charging station in good shape by:
– Regular Cleaning: Dust can accumulate on devices and chargers.
– Updating Cables and Chargers: Technology changes; newer devices might need updated cables.
– Rearranging as Needed: As you add or remove devices, adjust the station for best use.
Additional Tips for a Perfect Charging Station
– Add a Clock or Timer: Helps track charging times.
– Incorporate a Small Light: Useful for nighttime charging.
– Use a Charging Station with Built-in Safety Features: Some offer automatic shutoff or temperature monitoring.
– Keep Spare Cables Nearby: For guests or emergencies.
—
Creating a charging station is a straightforward project that can improve your everyday routine. With the right setup, you’ll enjoy a neat, efficient space where all your devices are charged and ready when you need them. Start by choosing your location, gather your supplies, and gradually organize your cables and devices. Soon, charging your electronics will be a hassle-free, organized experience!